Provisioning Tool
Provisioning
Click on the Lock button on the left panel to enter into the Provisioning panel.
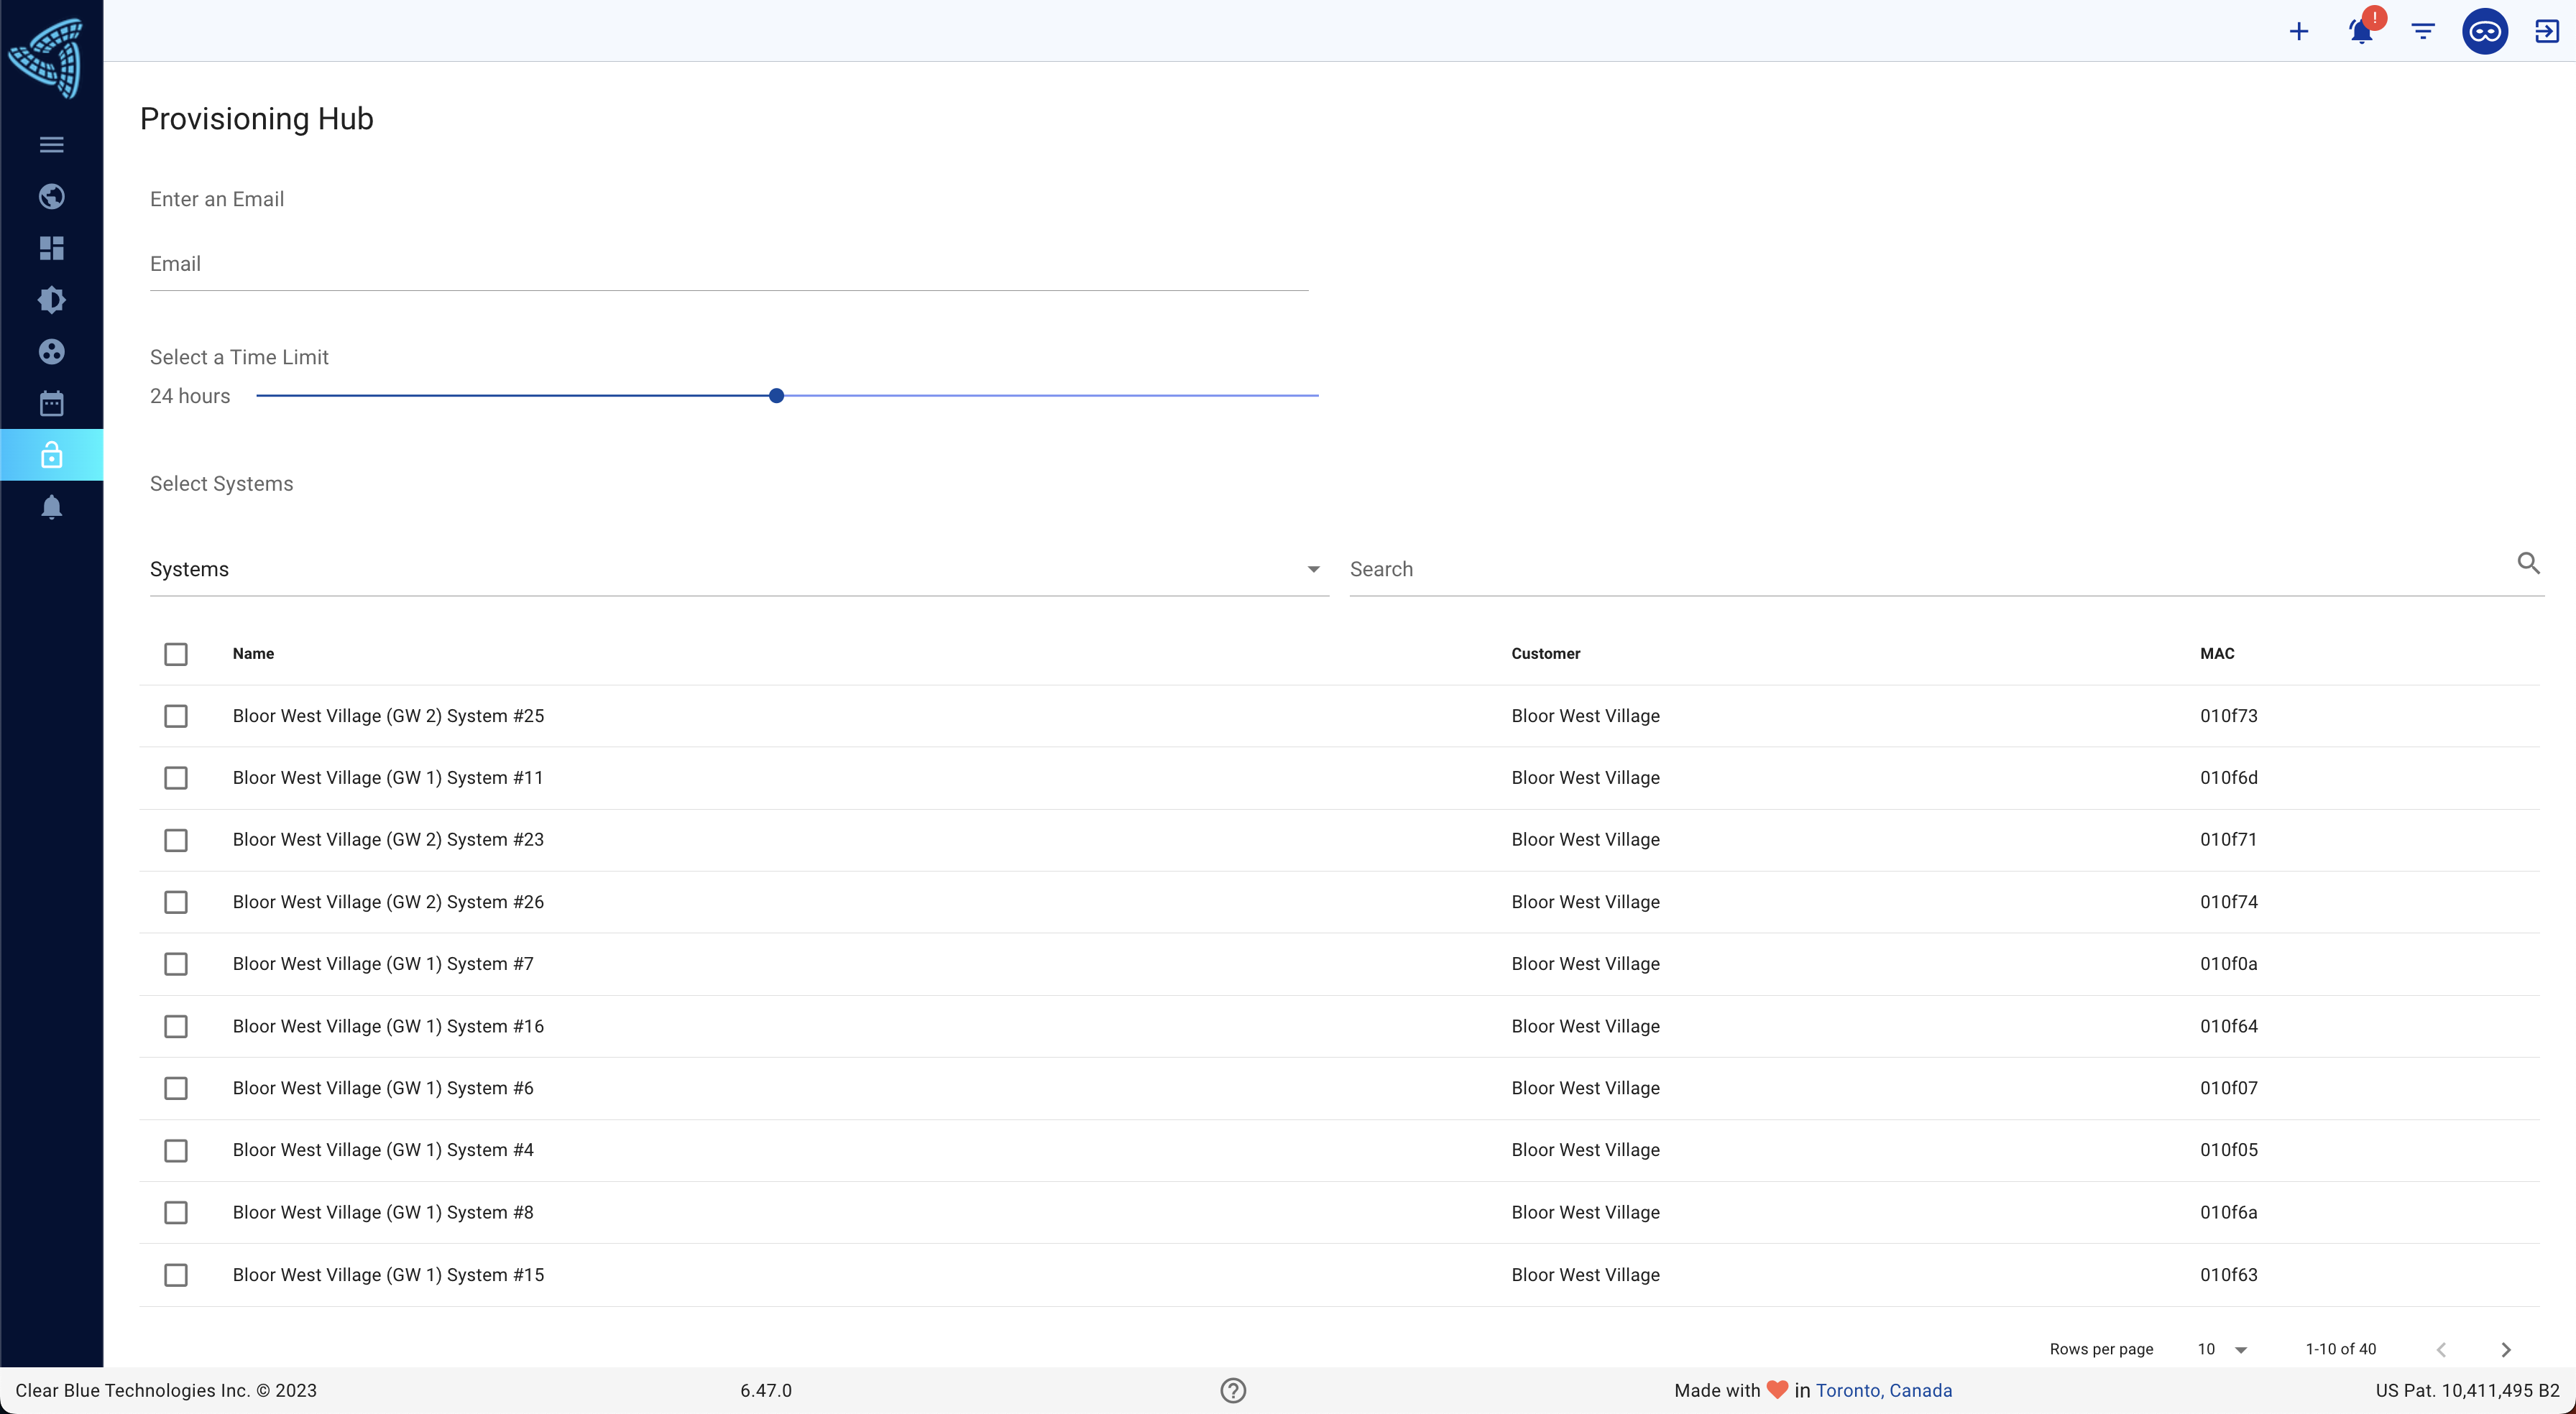
Provisioning Hub is accessible from the left menu. This tool allows you to grant temporary access to the provisioning tool for one or multiple systems, providing installers with the ability to configure the devices without specialized expertise or training.
To provide access, follow these steps:
- Specify installer details: Enter the installer's email address and set the desired duration of access in hours.
- Select access options: Choose whether the installer should have access to one/multiple systems, site(s), or network(s).
- Click Save: Save the settings to finalize the access provisioning.
Once saved, the installer will receive an email containing the URL for the provisioning tool. They can access the tool using a smartphone, tablet, or laptop.
Within the provisioning tool, the installer can switch between systems using the dropdown menu in the top left corner, allowing them to provision multiple systems on site.
The colored buttons on the tool's interface enable specific commands for each system. The installer has the capability to perform the following actions:
- UPDATE GPS: Captures the GPS coordinates of the installer's device.
- RESET SHORT CIRCUITS: Resets any short circuits detected within the system.
- L1 LIGHT TEST: Allows the installer to perform a quick light test on Load 1 to verify its functionality.
- L2 LIGHT TEST: Similar to the above, this test is performed on Load 2.
- P3 RESET: Resets P3 on the system.
By utilizing these functionalities, installers can conveniently configure and troubleshoot the systems.